
First step is to go to the products section and Select A Domain for SiteLock to cover. This cannot be changed after it’s been added, so be sure it’s the correct domain to avoid a cancel/repurchase.
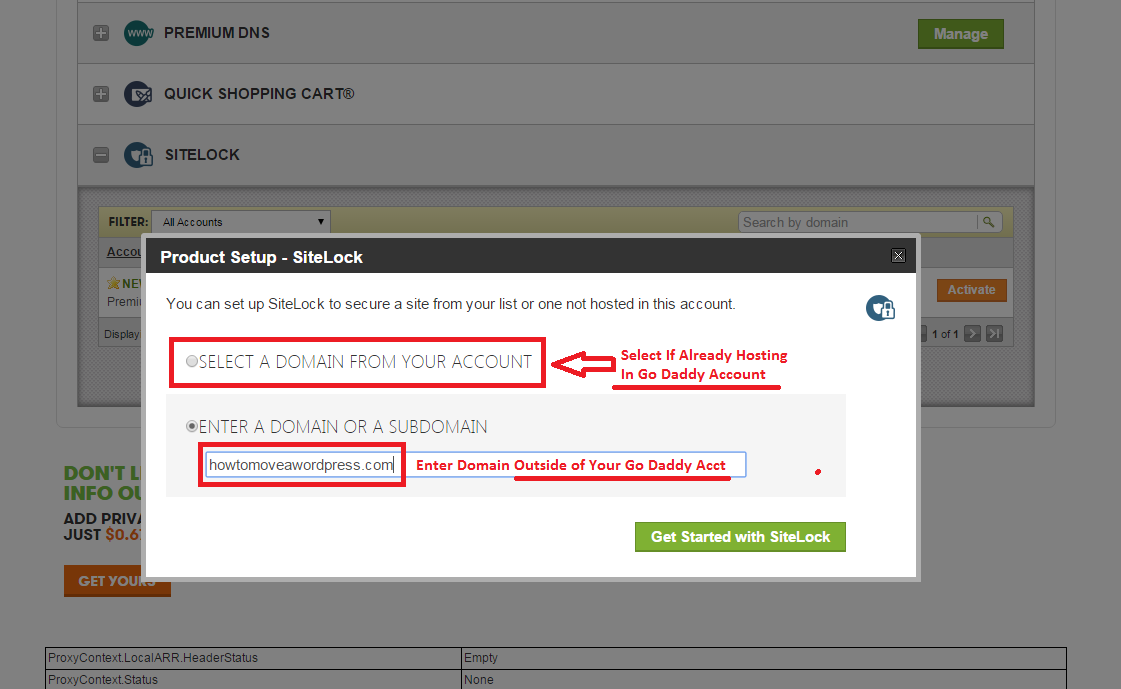
If the domain is already Hosted in the Go Daddy account, it will be available from the first dropdown. If Hosting/Domain/Website are outside of the account you’ll need to manually enter the Domain.


Older Control Panel – Shouldn’t Be Accessible Any Longer
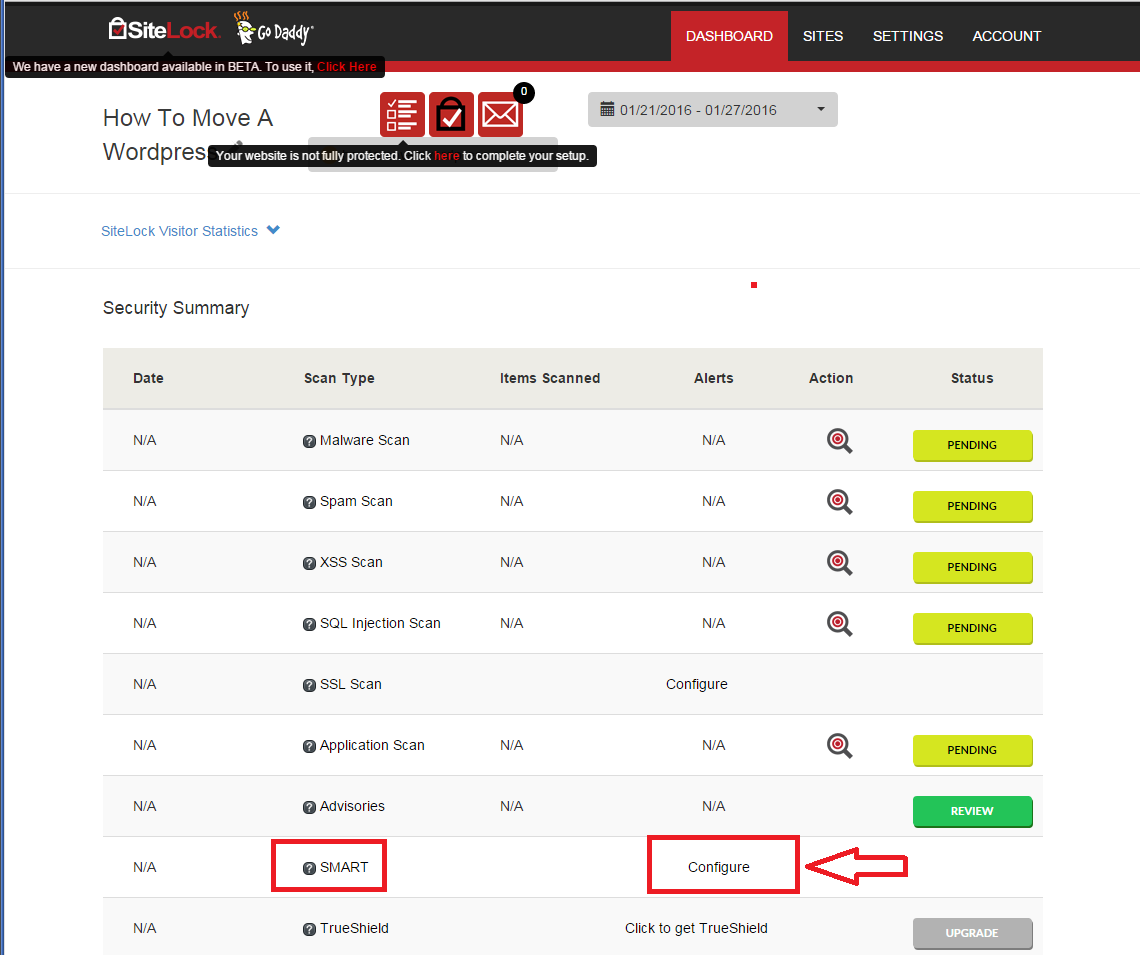
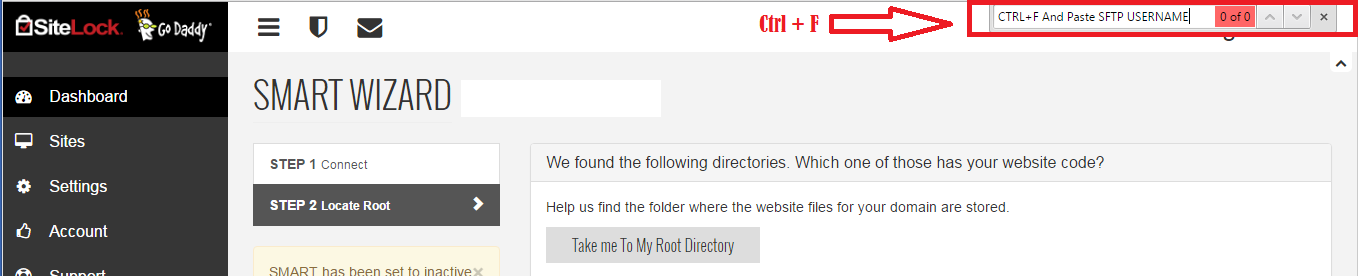
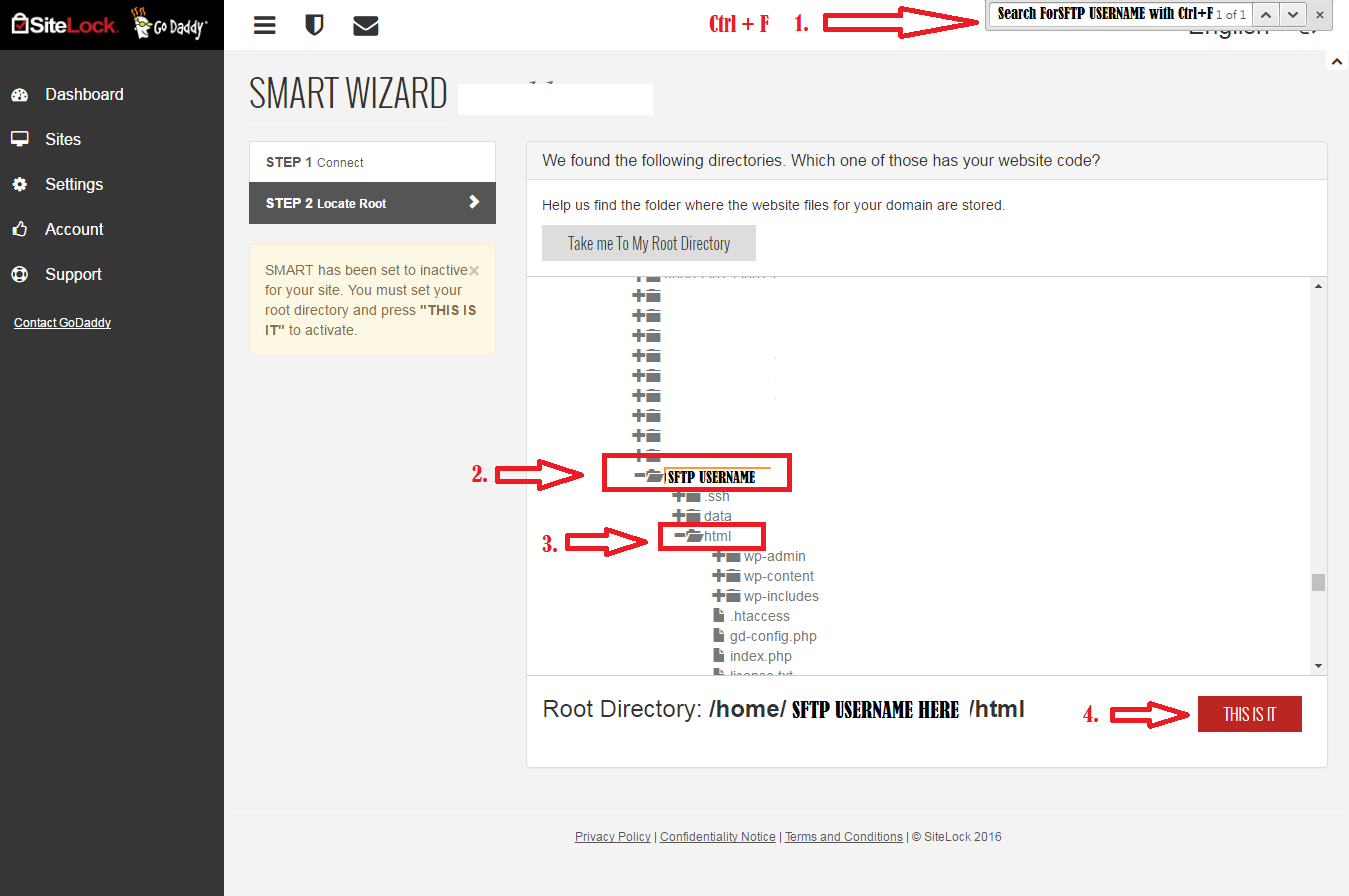
Once you are in the SiteLock software, click on the ‘CONFIGURE’ option for the ‘SMART’ scan to show you the wizard.

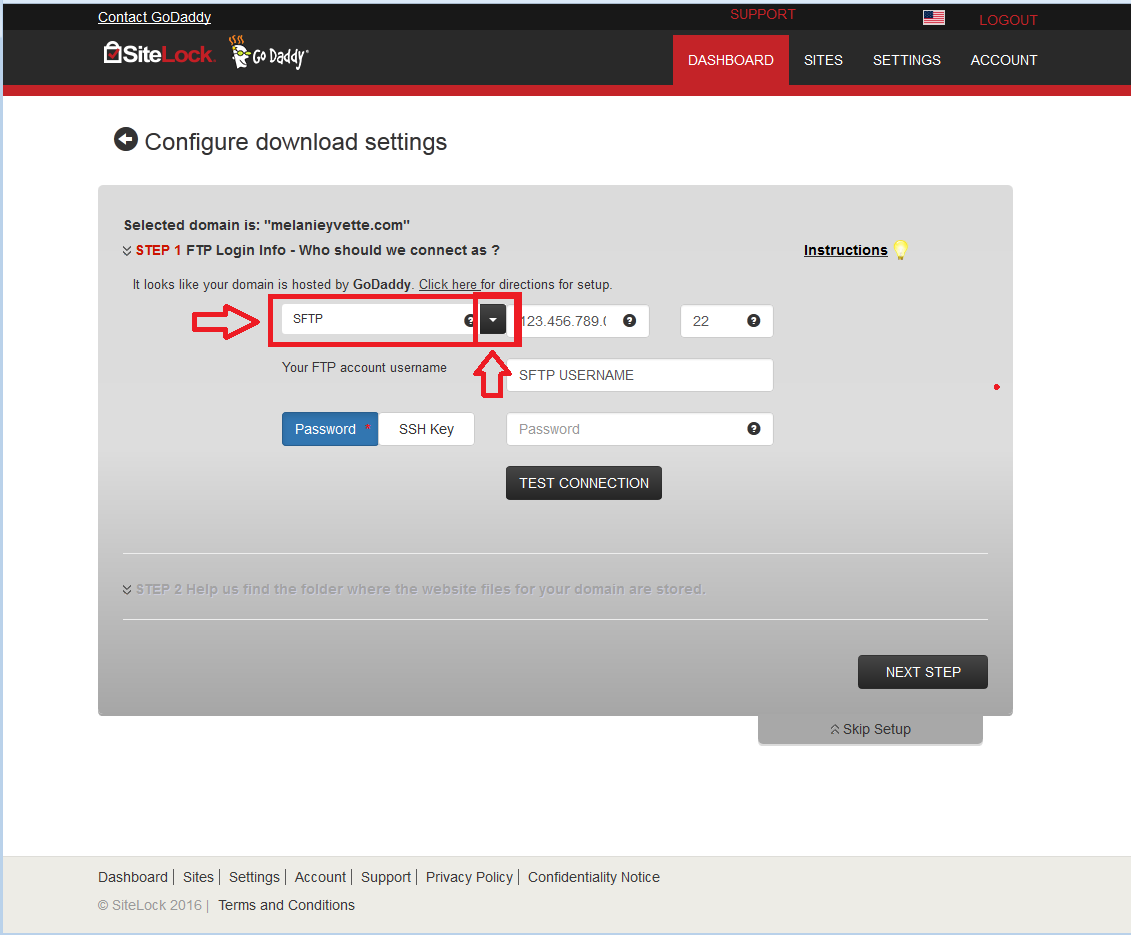
For Managed WordPress make sure you have selected ‘SFTP’ from the dropdown, and the port has been switched over to 22. From here you’ll need to grab the SFTP Settings from GATEWAY.GODADDY.COM.
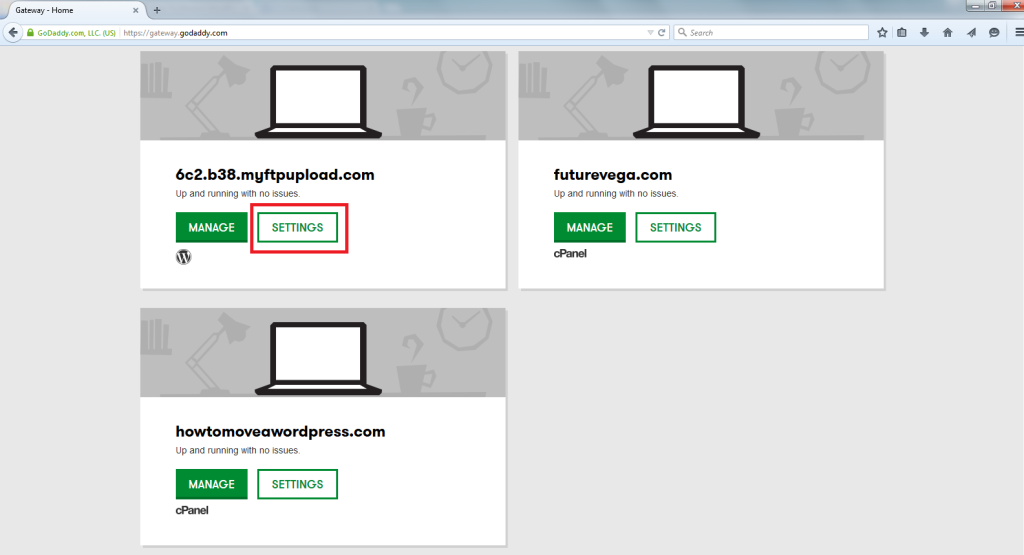
Find the Managed WordPress Account you are working with, and click on ‘Settings’.
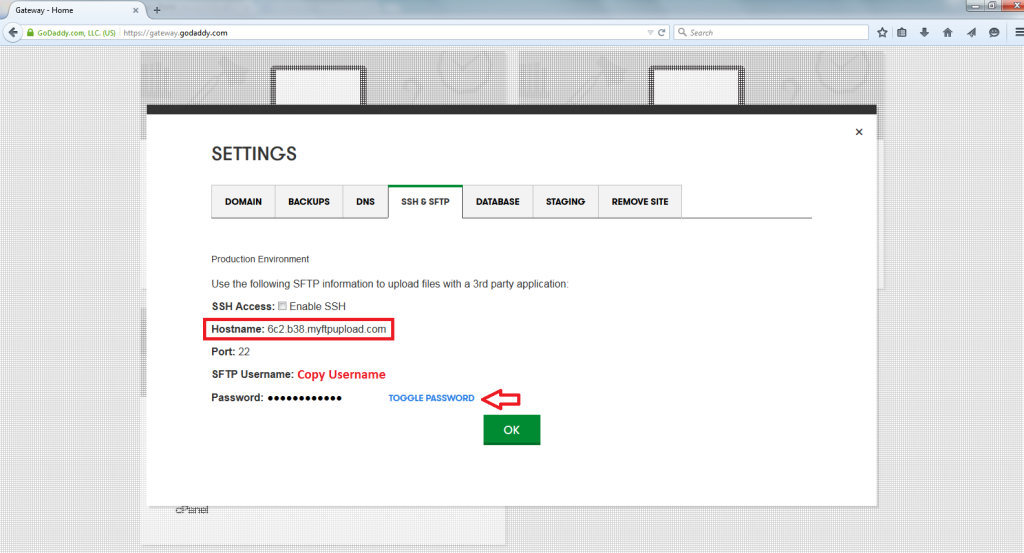
Navigate to the ‘SSH & SFTP’ tab. From here you can copy the ‘Hostname’ to put in the first field, and then copy the Username and Toggle Password to view the SFTP Password.