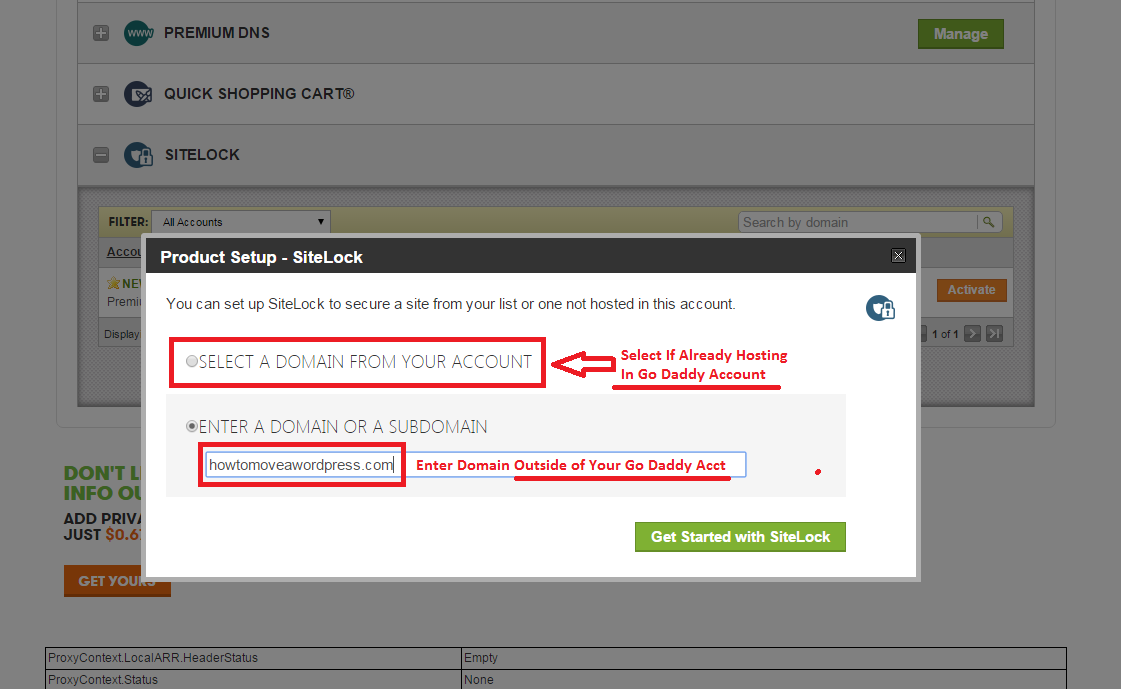
Go to your ‘My Products’ section and you will need to ‘Activate’ your new SiteLock account. If the domain is already Hosted in your account, you can select if from the DropDown. If the Hosting is in another account, or another provider, you will need to type it in manually.
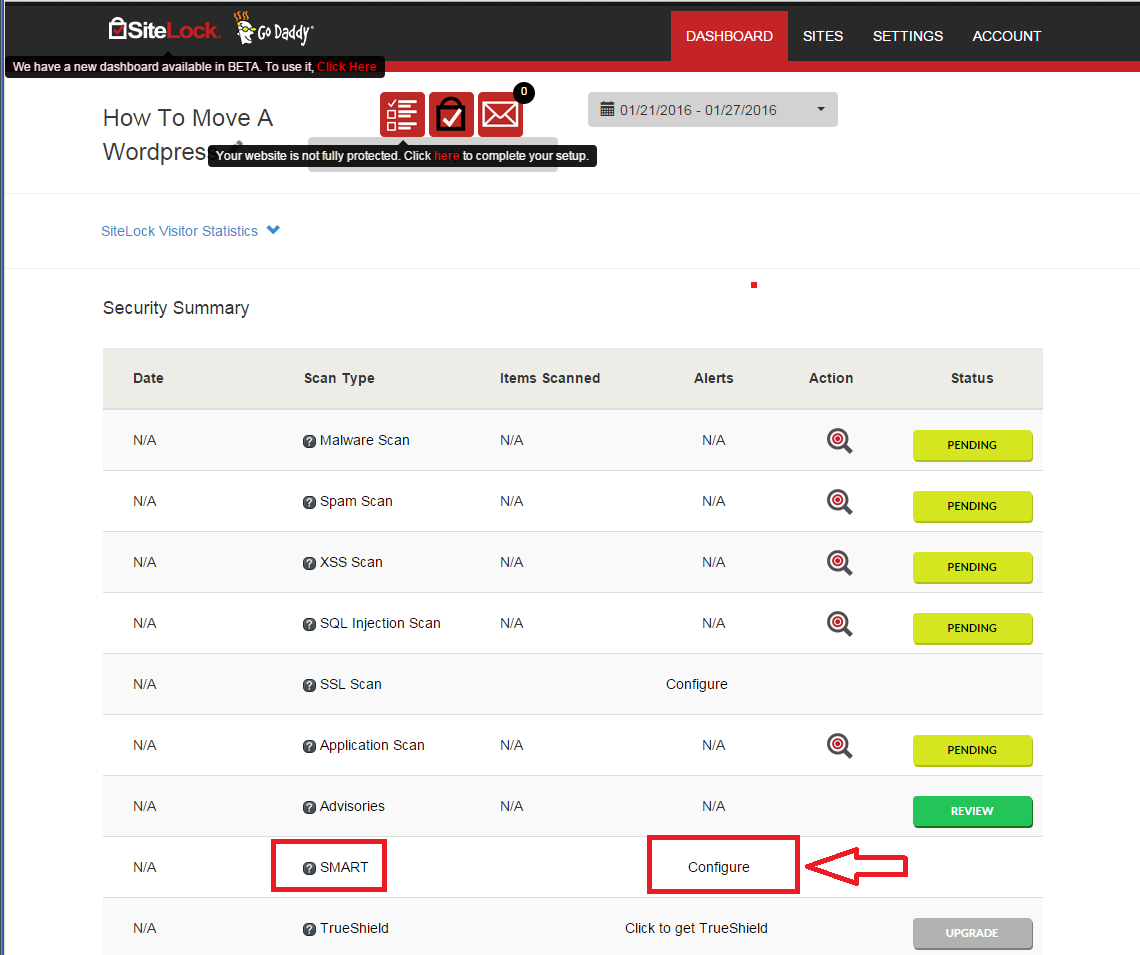
2. Once you’ve activated Sitelock on your Domain, you will need to ‘Configure the Smart Scan’. Click on the word ‘Configure’ to get started.
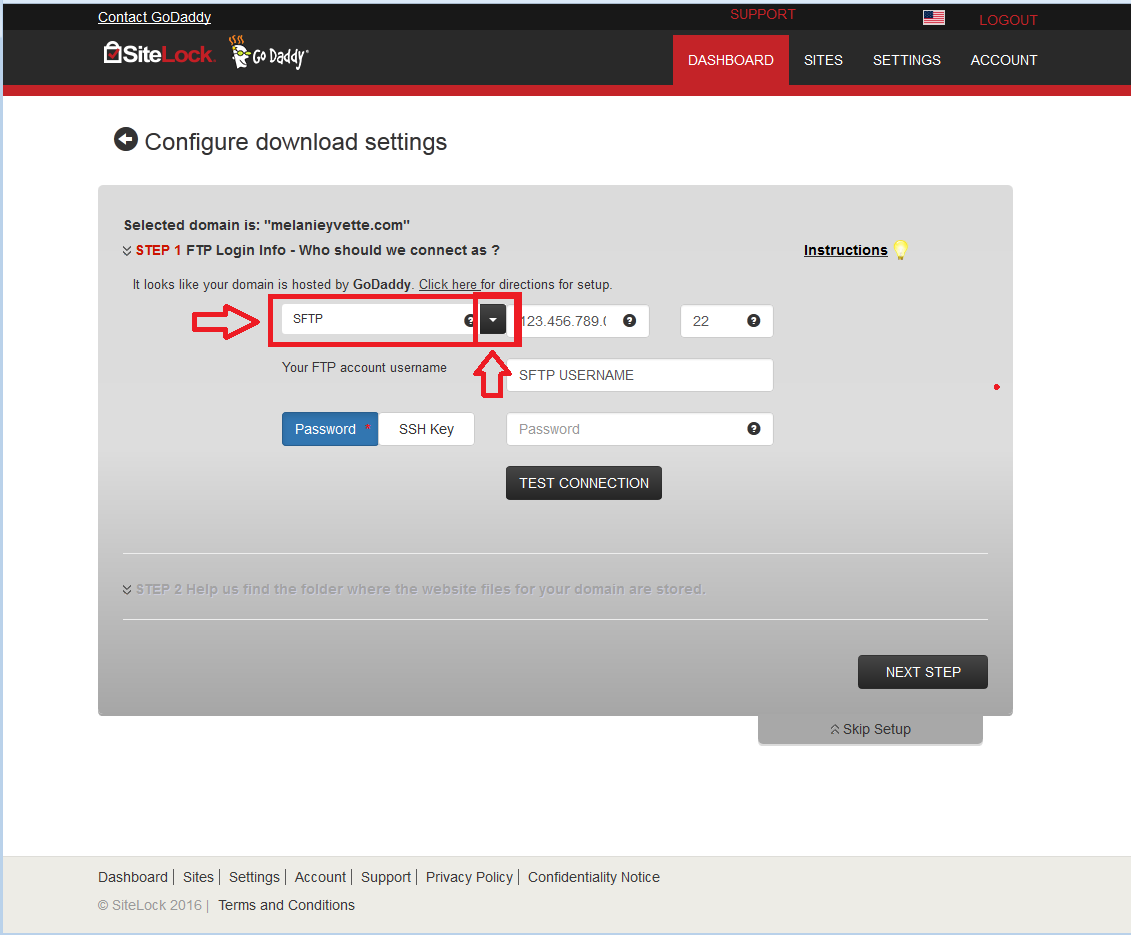
3. Set the Download settings to FTP, and you will need to grab the IP address from the Home screen in cPanel and already have an FTP User/PW set up, and use Port 21.
- FTP
- Hosting IP Address
- Port 21
- FTP Username
- FTP Password
- ‘Test Connection’
4. Once you’re connected, you’ll need to scroll down and select the /public_html as your root folder. (If you are putting this on an Add-On domain, the easiest option will be to create a separate FTP User going directly to the Addons root folder, but if you’re using the Primary cPanel User it will be “/public_html/coolexample.com”).
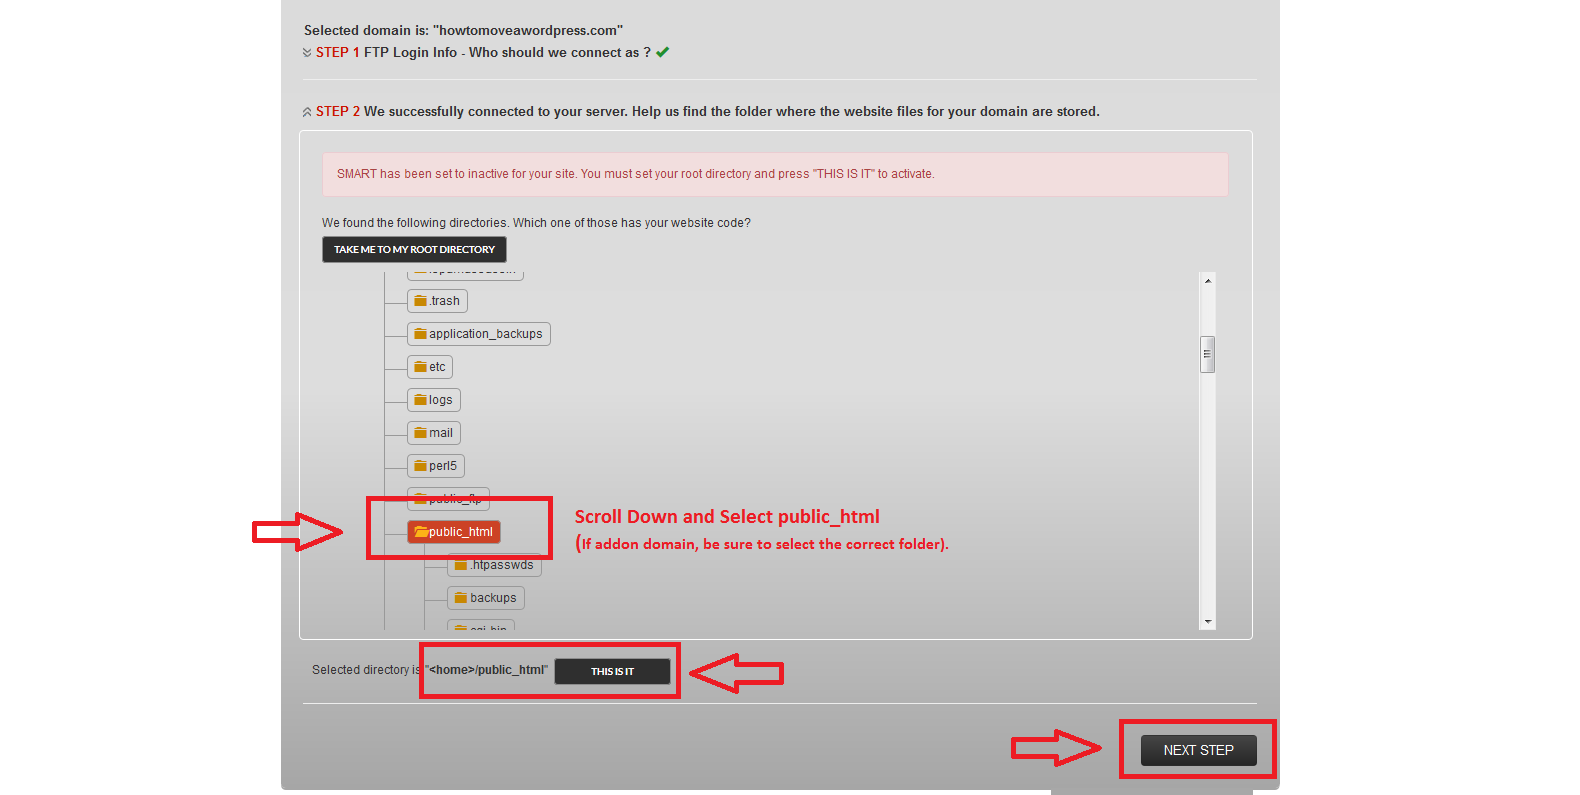
Once you’ve selected the Root Folder for your site, click on ‘THIS IS IT!’ you can move on to the Final Settings.
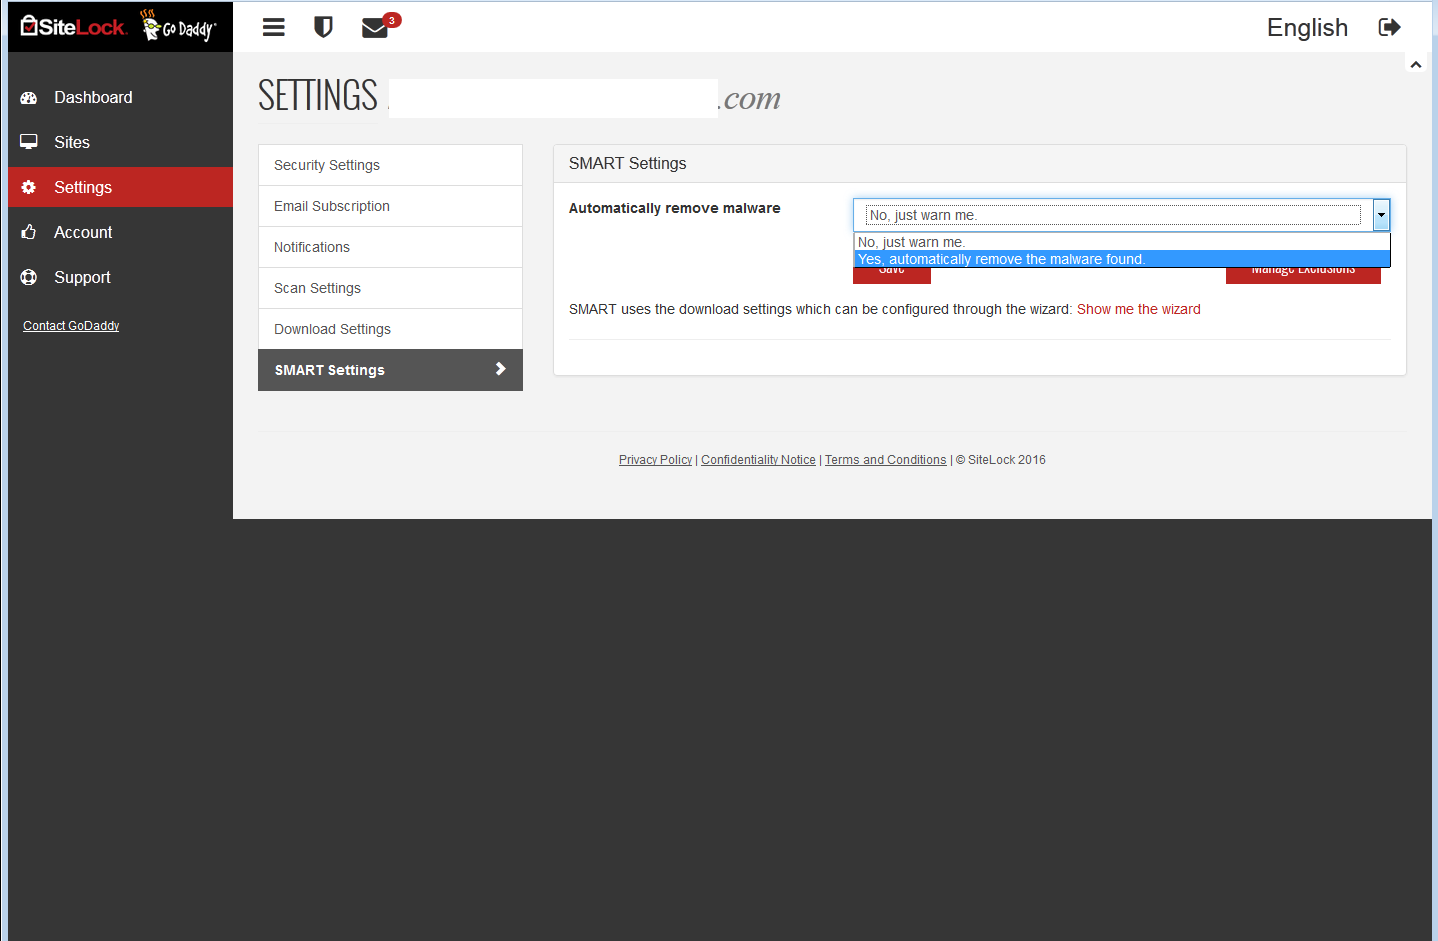
5. Under the SMART Settings make sure the default setting is set to Automatically Remove The Malware Found instead of the Warning. The Warning will not create any action other than telling them something they already know, they’re hacked.
The Next Steps are basically to change what email you want the notifications going to, and how often you want other scans to run, but you can keep everything else at default aside from to Automatically Remove The Malware Found with no issue. But if you’ve made it this far, you’re done!